Roman part 4 - finishing the full character blockout

Tutorial / 05 October 2020

Hi,


                I did a few hours on my Roman tonight, adding simple blockout geo to the model to highlight the general shape and form. 


                I was slightly concerned I had created him too bulky, however I felt it led to the idea of a powerful Roman.  Perhaps this is questionable if its historically accurate, im unsure, but it certainly lends to the aesthetic I wanted. 


                Most parts were created by duplicating the main mesh, clay tubes an area out to give it the same form as I wanted, then masking, polygroups, and deleting the unneeded areas and then some zremesh.  Later I can sculpt into these forms more and push the detail until im happy.


                At this stage it could be tested by the whole team, concept artists, art directors and even in game to make sure it works in situ, and could even be sent to rigging to begin testing the various elements.


                I think the next stage I would like to work on is to create the face for the model and begin adding more life to the project!  For that stage I will endeavour to add a breakdown and short tutorial of the facial sculpt and construction.    
Roman part 3 - finalising the blockout

Tutorial / 02 October 2020

HI,

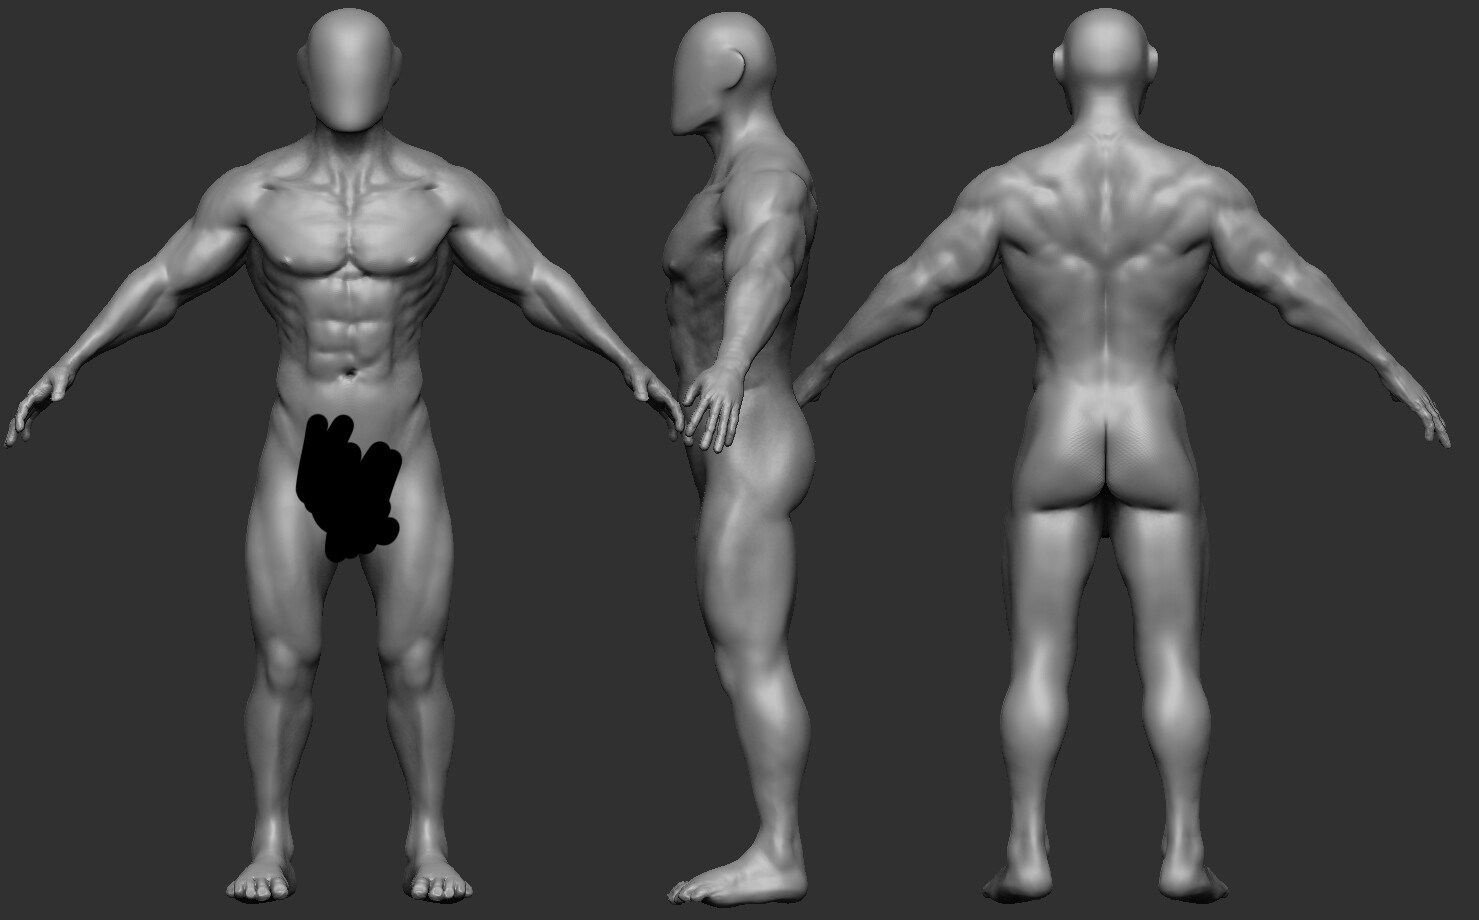
                I got a few more hours done today, only about 2 but it was enough to finalise the base mesh to a stage im happy to begin blocking out the rest of the structure to the character.

                I could detail the whole body, but at this stage there is no point when most will be covered by clothing.  Therefore to save time have opted to block out to a stage the shapes are pretty much defined, then begin building the main shapes.  This way I can ascertain if the model works, the silhouette is decent enough, and the forms themselves play against each other aesthetically. 


                Later, when refining the body after the main forms have been decided upon, I will detail up each area needed, and build upon the form.  But only in areas that will be exposed in the final character.


                For the next few days I am doing a reinstall of my pc, so won’t be posting any new updates for a few days.   


Thank you, i hope you are enjoying this series of breakdowns in the series of the creation of a AAA roman soldier.  

Roman part 2 - Building a base mesh

Tutorial / 01 October 2020

Today I spent about 4 hours on the sculpt.  I could have started with a old base mesh but I wanted to start from scratch to show the full process.

I used reference from 3D.SK as well as a two anatomy figures from 3D Total of the male figure which I bought from the Kickstarter when they were first published.  I have a solid understanding of anatomy, however  I refer to the anatomy figures or reference to help create my own base.  In the end reference will help create more realistic work.

Here below you can see i began initially with a 3d.sk model in zbrush in the back and side view, and drew a zsphere skeleton, which I converted to polys to shape more, divided, and sculpted away more until I felt the general proportions were working.

I have used this method many times in studios when they need a fast output of characters, producing with Zspheres anything required in the concept and can test the scale and proportions before creating the smaller details.  it also allows the concept artists and Leads to check the work throughout to be sure you can nail the concept quickly.  


I feel there is still some areas of improvement, and I want to reduce the cavitys in areas when adding the smaller details, but for tonight im happy with the progress. 

Roman part 1 - the idea

Tutorial / 30 September 2020

I want to try something new, that I feel could be beneficial for other artists interested in character creation for games.  So from tonight I’m aiming to create a Roman character, and will blog about the process, showing breakdowns at stages throughout.  It might be a long process I also work full time.  But will devote my spare time to it and detail the creative process so others may learn some techniques in character creation.  At some point through the next few months also I hope to begin a youtube channel with short tutorials on the creative process, to again help, with bitesize tips that will help the reader/viewer also grow as artists as well as myself through this journey. 


So to begin - 


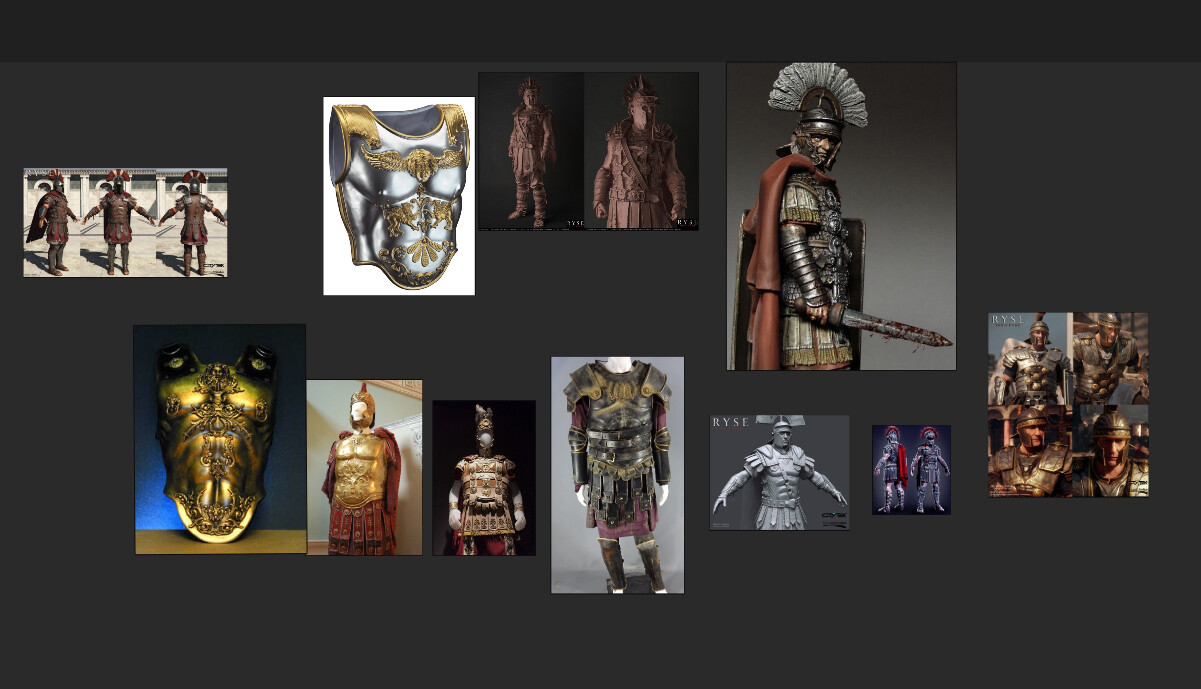
Last night I spent about 3 hours researching what I was after in my character, using google image search and Artstation.  I have been quite inspired by Ryse, as well as other unique roman soldier characters found on Artstation, and the uniforms typically shown on image searches.    


I use PURE REF, for my reference hunt.  I can happily copy and paste images into it, organise them, and zoom in and out into the various images.


Initially I was imagining a roman riding a chariot however I also want to really go a little wild with the detail, which would be lost if you never get to see the character up close.  So cut down my vision to a soldier again.  Which this morning I went back to, and selected the images that pleased me the most, that I could be inspired for in the creation process. 


That's it for today, more over the next few days....